For your convenience, Averett will accept your Digital Signature on the downloadable PDF forms listed on the New Student Checklist page. To create your digital signature, please follow the instructions below:
1. Download the PDF document to your desktop.

2. Open the PDF document and begin filling out the required fields. Save the signature for the last step of completing the form. Once all fields are complete, click on the small red arrow above the signature box.

3. A window will open with three options. Select Create a New Digital ID.
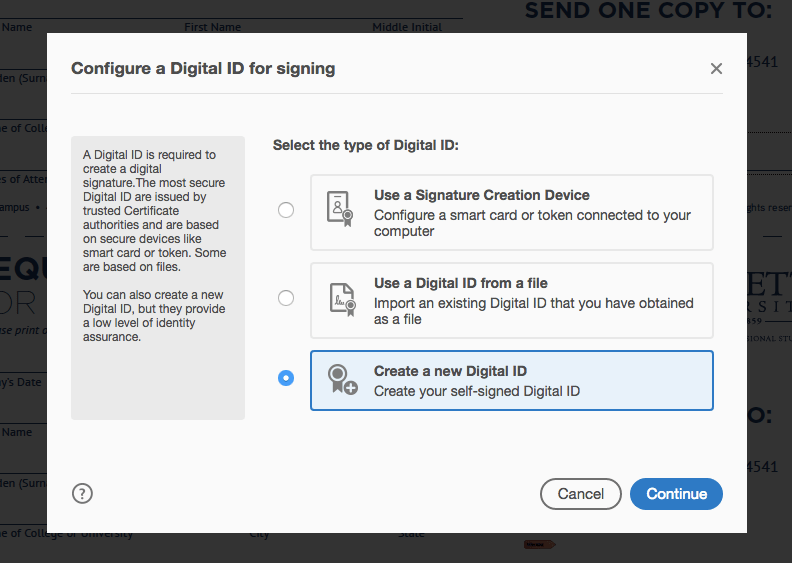
4. Follow the steps to create your Digital ID. On the next screen, select SAVE TO FILE and then click CONTINUE.
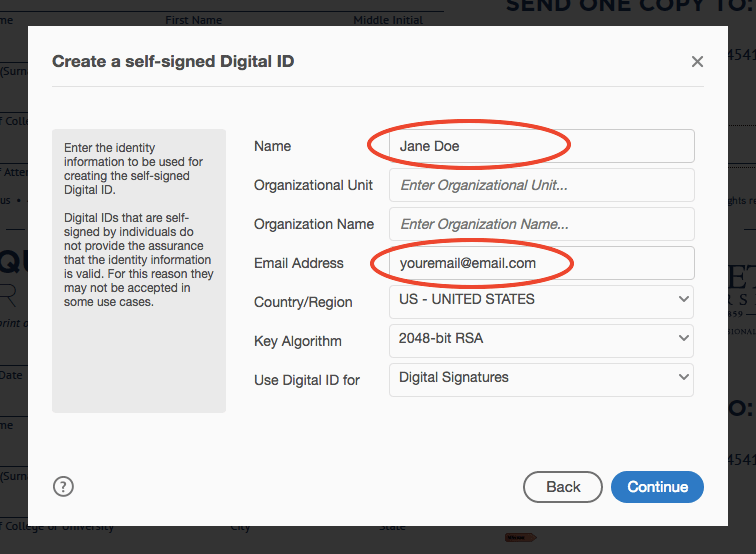
5. On the next screen, fill in your Name and Email – leave every other field as is.
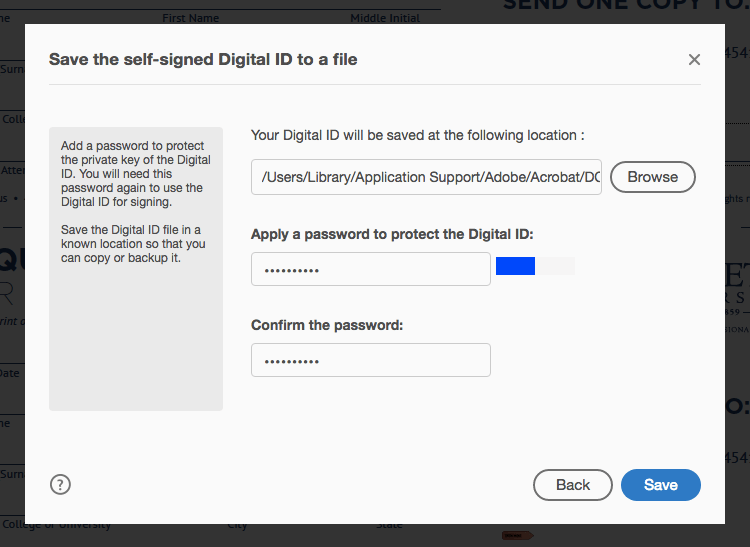
6. Next, create your password for the digital ID:
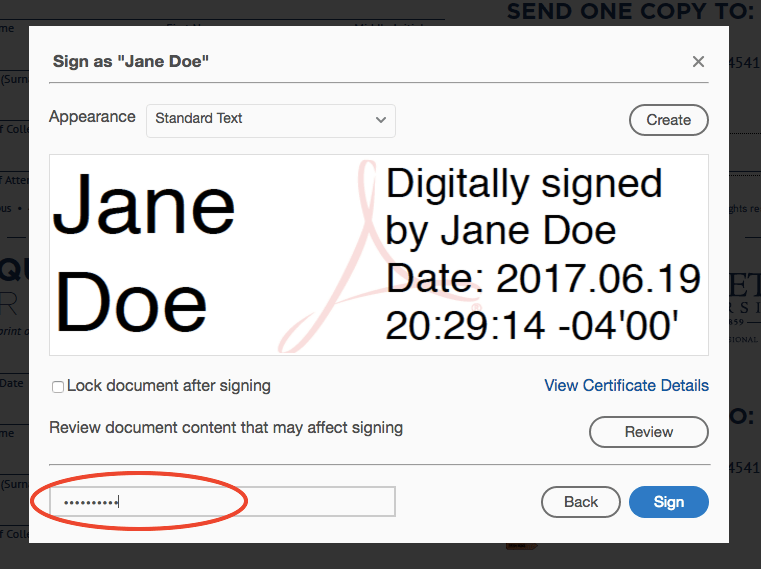
7. After you click SAVE, your digital ID will appear on screen. Enter your new password, then click SIGN.
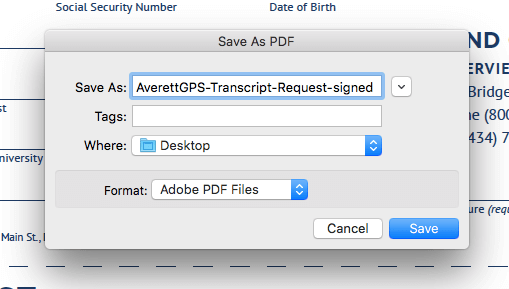
8. A Save As screen will appear to save your newly signed document. If you’d like, add “-signed” to the file name so that you can distinguish between the original download and the new signed document on your desktop. Click SAVE.
9. Your digital ID will appear like this:

10. Upload the completed and signed document using the UPLOAD button associated with the document on the New Student Checklist page.
Now that you have set up your Digital ID, you will be given the option to use it any time you need to sign a PDF.
You may also print each PDF, complete it by hand, scan it, and upload the scanned document or email it directly to: [email protected].
